A New Lease on Life: A Comprehensive Guide to Repurposing Your 2011 iMac
By Seth Shoultes | Published: | Updated:
Categories: Hardware
Tags: apple, imac
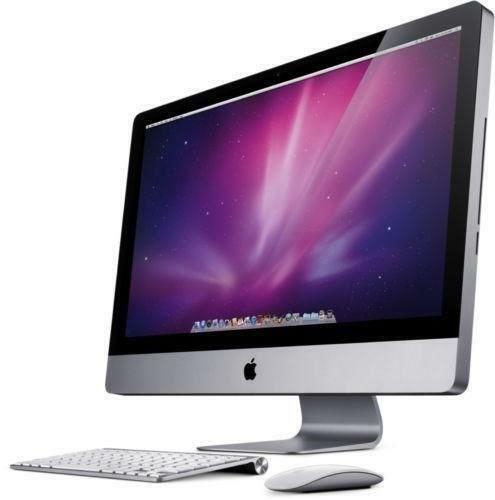
That elegant aluminum unibody, the crisp, bright display, the satisfying click of the magnetic latch on the RAM cover—the 2011 iMac was a design icon. But as technology marches on, even the most beloved machines can feel left behind. If your 2011 iMac is gathering dust, you might be wondering if it’s destined for the recycling heap. The answer is a resounding no. With a little creativity and some open-source software, your old iMac can be transformed into a versatile and surprisingly powerful machine for a wide range of fun and practical projects.
This guide will explore the many possibilities for your 2011 iMac, from turning it into a high-performance media server to a dedicated retro gaming station. We’ll cover everything you need to know, including the best Linux distributions for your hardware, step-by-step project ideas, and tips for getting the most out of your machine. Whether you’re a seasoned tech enthusiast or a curious beginner, you’ll find plenty of inspiration to give your old iMac a new lease on life.
Understanding Your 2011 iMac: Still Got It
Before diving into projects, it’s helpful to understand the hardware you’re working with. The 2011 iMacs were surprisingly capable for their time and still offer a solid foundation for many modern tasks. Here’s a quick look at their key specifications:
| Feature | 21.5-inch Model | 27-inch Model |
| Display | 1920×1080 (Full HD) | 2560×1440 (QHD) |
| Processor | Quad-core Intel Core i5/i7 | Quad-core Intel Core i5/i7 |
| Memory | 4GB standard, up to 16GB | 4GB standard, up to 16GB |
| Graphics | AMD Radeon HD 6750M/6770M | AMD Radeon HD 6770M/6970M |
| Storage | 500GB/1TB HDD, optional SSD | 1TB HDD, optional SSD |
| Connectivity | Thunderbolt, USB 2.0, FireWire 800, Wi-Fi, Ethernet | Thunderbolt, USB 2.0, FireWire 800, Wi-Fi, Ethernet |
The most important takeaway here is that these machines have 64-bit quad-core processors, which are essential for running modern software. The beautiful high-resolution displays are also a major asset, making them ideal for visual projects. While the original hard drives can be slow, upgrading to an SSD is a relatively simple and affordable way to dramatically boost performance.
Creative Projects: Giving Your iMac a New Purpose
Now for the fun part: what can you actually do with your newly revived iMac? Here are some ideas, ranging from simple to more advanced, to get you started.
Performance Projects
•Media Server: Your iMac can become the heart of your home entertainment system. With software like Plex or Kodi, you can organize and stream your entire library of movies, music, and photos to any device on your network, from your smart TV to your smartphone. The 2011 iMac’s processor is more than capable of handling multiple streams, and its ample storage can be expanded with external drives.
•Retro Gaming Station: Relive the golden age of gaming by turning your iMac into a retro emulation powerhouse. With emulators like OpenEmu for macOS or RetroArch for Linux, you can play classic games from a huge variety of consoles, from the NES and Sega Genesis to the PlayStation and Dreamcast. The iMac’s large, high-resolution screen is perfect for enjoying these vintage titles in all their pixelated glory.
Learning & Development
•Linux Playground: If you’ve ever been curious about Linux, your old iMac is the perfect place to start. Installing a user-friendly distribution like Ubuntu or Linux Mint is a great way to learn the ins and outs of a new operating system without any risk to your primary computer. You can experiment with the command line, try out different desktop environments, and explore the vast world of open-source software.
•Home Lab & Server: For more advanced users, the iMac can serve as a powerful home lab for a variety of projects. You can set up a web server, a file server, or even a private cloud with software like Nextcloud. This is a great way to learn about networking, system administration, and other valuable tech skills.
Practical Applications
•Home Automation Hub: Take control of your smart home with Home Assistant. By installing Home Assistant OS on your iMac, you can create a powerful, centralized hub to manage all your smart devices, from lights and thermostats to cameras and sensors. This gives you ultimate control and privacy, as all your data is stored locally.
•Dedicated Workstation: Sometimes the best use for an old computer is to dedicate it to a single task. Your iMac can be a distraction-free writing station, a dedicated video conferencing machine for Zoom or Google Meet, or a kitchen computer for recipes and music. By focusing on one task, you can create a more efficient and enjoyable workflow.
Creative Repurposing
•Digital Photo Frame or Art Display: The iMac’s beautiful display is its standout feature, so why not make it the star of the show? You can turn your iMac into a stunning digital photo frame to display your favorite memories, or a dynamic digital art display showcasing a rotating collection of artwork. With a little creativity, you can even build a custom frame around the iMac to make it a true centerpiece.
•Smart Mirror: For the truly adventurous, the iMac’s display can be transformed into a futuristic smart mirror. This project involves removing the screen’s polarizing film and placing it behind a two-way mirror. The result is a mirror that can display the time, weather, news headlines, and more.
Choosing Your Operating System: The World of Linux
While your 2011 iMac can no longer run the latest version of macOS, it is more than capable of running a modern Linux operating system. Linux is a powerful, versatile, and free open-source operating system that comes in many different flavors, known as distributions or “distros.” Installing Linux is the key to unlocking your iMac’s full potential for all the projects we’ve discussed.
Why Linux?
•Modern & Secure: Linux is actively developed and receives regular security updates, keeping your machine safe from modern threats.
•Lightweight & Fast: Many Linux distros are designed to be lightweight and run efficiently on older hardware, making your iMac feel snappy and responsive again.
•Customizable: From the look and feel of the desktop to the underlying system settings, Linux offers unparalleled customization options.
•Free & Open Source: The vast majority of Linux software is free to use and modify, giving you access to a massive library of powerful tools.
Recommended Linux Distributions for Your 2011 iMac
Choosing the right distro can seem daunting, but for the 2011 iMac, there are several excellent options that offer a great balance of performance, features, and ease of use. Here’s a comparison of our top recommendations:
| Distribution | Best For | Key Features | Performance |
| Ubuntu 24.04 LTS | Beginners, General Use | User-friendly, large community, 5 years of support | Excellent |
| Linux Mint | Stability, Windows-like UI | Rock-solid, easy to use, multiple desktop options | Excellent |
| Zorin OS | macOS-like Experience | Polished interface, mimics macOS look and feel | Very Good |
| elementary OS | Beautiful Design | Clean, elegant, and intuitive user experience | Very Good |
| Lubuntu | Maximum Performance | Very lightweight, ideal for systems with less RAM | Best |
| ChromeOS Flex | Web-based Simplicity | Turns your iMac into a Chromebook-like device | Best |
For most users, Ubuntu 24.04 LTS or Linux Mint are the best starting points. They are both incredibly easy to install and use, and they have large, helpful communities if you ever run into trouble. If you want something that feels more like macOS, Zorin OS and elementary OS are fantastic choices. For those who want to squeeze every last drop of performance out of their machine, Lubuntu is an excellent lightweight option.
A Note on Raspberry Pi
It’s a common point of confusion, so it’s worth clarifying: Raspberry Pi is a type of small, single-board computer, not an operating system you can install on your iMac. While Raspberry Pi devices run their own version of Linux (Raspberry Pi OS), you cannot install Raspberry Pi OS directly on an iMac. The projects discussed in this guide are all accomplished by installing a standard Linux distribution on your iMac’s existing hardware.
General Installation Guide
Installing Linux on your iMac is surprisingly straightforward. Here’s a general overview of the process:
1.Choose Your Distro: Select one of the recommended distributions from the table above.
2.Download the ISO: Go to the official website of your chosen distro and download the 64-bit desktop version. This will be a single file with a .iso extension.
3.Create a Bootable USB Drive: You’ll need a USB drive (at least 8GB). Use a free tool like balenaEtcher to write the ISO file to your USB drive. This will create a bootable installer.
4.Boot from the USB Drive: Plug the USB drive into your iMac. Restart the computer and immediately press and hold the Option (or Alt) key on your keyboard. This will bring up the startup manager.
5.Select the USB Drive: You should see an option to boot from the USB drive (it will likely be labeled “EFI Boot” or something similar). Select it and press Enter.
6.Try or Install: Your iMac will now boot into the Linux installer. Most distros offer a “live” environment, which lets you try out the operating system before you install it. When you’re ready, launch the installer and follow the on-screen instructions. The installer will guide you through the process of partitioning your hard drive and installing Linux.
For most users, it’s best to erase the hard drive and install Linux as the only operating system. This will give you the best performance and avoid any potential conflicts with macOS.
Maximizing Performance: Upgrade Tips
While your 2011 iMac is perfectly capable of running Linux and many projects out of the box, a few simple hardware upgrades can dramatically improve its performance and make it feel like a brand-new machine.
RAM Upgrade
If your iMac only has the standard 4GB of RAM, upgrading to 8GB or even 16GB is one of the best investments you can make. More RAM allows your system to run more applications simultaneously and handle more demanding tasks. Fortunately, upgrading the RAM on a 2011 iMac is relatively easy—the RAM slots are accessible through a small panel on the bottom of the machine.
SSD Upgrade
This is the single most impactful upgrade you can make. Replacing the original spinning hard drive with a solid-state drive (SSD) will dramatically speed up boot times, application launches, and overall system responsiveness. While the process is more involved than a RAM upgrade (it requires opening up the iMac), the performance gains are absolutely worth it. A 500GB SSD is a great starting point and is very affordable.
External Storage
If you’re using your iMac as a media server or NAS, you’ll likely need more storage than the internal drive can provide. External USB hard drives are inexpensive and easy to add. You can also use network-attached storage (NAS) devices to expand your storage capacity.
Troubleshooting Common Issues
While Linux generally works well on the 2011 iMac, there are a few potential issues you might encounter:
•Wi-Fi Not Working: In some cases, the Wi-Fi driver may not be included by default. You can usually fix this by connecting via Ethernet and installing the necessary drivers from the distro’s software repository.
•Brightness Control: The function keys for adjusting screen brightness may not work out of the box. There are usually workarounds available, which can be found by searching for your specific distro and “iMac brightness control.”
•Fan Noise: Some users report that the fans run louder under Linux than they did under macOS. This is often due to less sophisticated power management. Installing additional tools like mbpfan can help.
•Graphics Performance: While the AMD Radeon graphics in the 2011 iMac are generally well-supported, you may need to install proprietary drivers for optimal performance, especially for gaming or video editing.
Most of these issues have well-documented solutions online. The Linux community is incredibly helpful, and a quick search will usually point you in the right direction.
Project Walkthroughs: Getting Started
Here are some quick-start guides for a few of the most popular projects:
Setting Up a Plex Media Server
1.Install Ubuntu or Linux Mint on your iMac.
2.Go to the Plex website and download the Plex Media Server for Linux.
3.Install the downloaded package.
4.Open a web browser and navigate to http://localhost:32400/web to access the Plex setup wizard.
5.Follow the wizard to add your media libraries (movies, TV shows, music, photos).
6.Install the Plex app on your other devices (smart TV, phone, tablet) and sign in with the same account.
7.Enjoy streaming your media library!
Creating a Home Automation Hub with Home Assistant
1.Prepare your iMac by disabling Secure Boot (if necessary) and ensuring it has an Ethernet connection.
2.Download the latest version of Ubuntu from the official website.
3.Create a bootable USB drive using balenaEtcher.
4.Boot from the USB drive and select “Try Ubuntu.”
5.Open Firefox and download the Home Assistant OS image from the official website.
6.Use the Disks utility to restore the Home Assistant image to your iMac’s internal drive.
7.Reboot your iMac, and it will boot into Home Assistant OS.
8.Access the Home Assistant web interface from another device on your network by navigating to http://homeassistant.local:8123.
Building a Retro Gaming Station
1.Install Ubuntu or Linux Mint on your iMac.
2.Download and install RetroArch from the software repository or the official website.
3.Launch RetroArch and use the built-in downloader to install “cores” (emulators) for your favorite classic consoles.
4.Add your game ROMs to a folder on your iMac.
5.In RetroArch, scan the folder to import your games into the library.
6.Connect a USB game controller (optional but recommended).
7.Start playing!
Conclusion: A Second Life Awaits
Your 2011 iMac is far from obsolete. With a little effort and the power of open-source software, it can be transformed into a versatile and valuable tool for a wide range of projects. Whether you’re looking to learn new skills, create a home entertainment system, or simply give your old machine a new purpose, the possibilities are virtually endless.
Don’t let that beautiful aluminum design gather dust. Embrace the challenge, explore the world of Linux, and give your 2011 iMac the second life it deserves. You might be surprised at just how much it can still do.
References
1.Apple Support – iMac (21.5-inch, Mid 2011) – Technical Specifications
2.PCMag – Avoid the Trash Heap: 17 Creative Uses for Your Old Computer
3.Medium – Repurposing an old iMac with Ubuntu
4.XDA Developers – How you can turn an old PC into a smart home hub
5.The Linux Shop – Breathing New Life into Your iMac (Mid 2011) with Linux
6.Plex – Official Website
7.Home Assistant – Official Website
8.RetroArch – Official Website
9.balenaEtcher – Official Website
10.Ubuntu – Official Website
11.Linux Mint – Official Website
This guide was compiled through extensive research of community forums, technical documentation, and user experiences. While every effort has been made to ensure accuracy, your specific hardware configuration and software versions may vary. Always back up your data before making significant changes to your system.